Price Import
The Price Import area contains four sub-tabs that allow users to Import Materials, Import Prices, Export Client Materials, and download the Price Increase Report.

Material Import
The Material Import section allows users to import Materials into the system, which can then be used when importing Prices through the Price Import functionality.
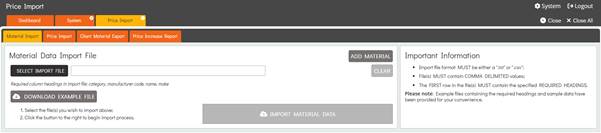
The user can extract an example file by selecting Download Example File which enables them to see the required fields in the CSV output.

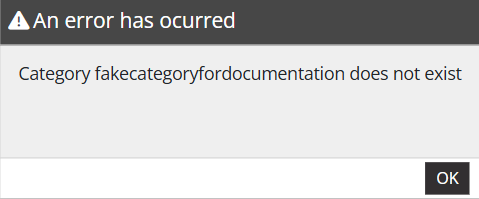
The Category value must match the name of an existing Category configured in the Categories area. If an invalid Category is entered for a Material, the import will fail.
Once the import file is prepared, users must select the Select Import File button. The system opens the user’s File Explorer, allowing them to choose and upload their import file.
Selecting the Clear button will clear the ‘Import File’ field so the user can upload a different file.
To import the selected file, the user can select the Import Material Data button. The system will then display a confirmation popup. If the user selects Yes, the Materials will be added to the system and be displayed in the Materials list.
Each Manufacturer Code for a Material must be unique. If the user enters a Manufacturer Code that already exists in the system, the system will display the Update Materials popup. This popup compares the Material being imported with the existing Material in the system that uses the same Manufacturer Code.
The comparison includes values such as Code, Original Name, Updated Name, Original Category, Updated Category, Original Make, and Updated Make.
The user can choose to Close the popup and amend the Manufacturer Code or confirm the changes and continue with the import. Confirming the changes and performing the import will update the existing Material in the system with the new values from the import file.

If the user selects the Add Material button, the system will direct the user to a new material record which is explained in System Materials.
Price Import
The Price Importsection allows the users to implement Prices in the system which are allocated to a specific Supplier for a Client.
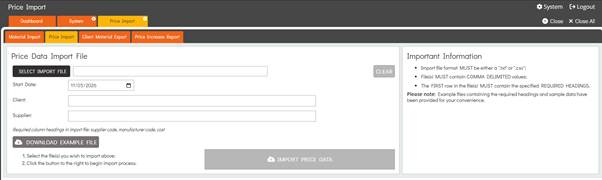
The user can extract an example file by selecting Download Example File which enables them to see the required fields in the CSV output.

Once the import file is prepared, users must select the Select Import File button. The system will open the user’s File Explorer, allowing them to choose and upload their import file.
Selecting the Clear button will clear the ‘Import File’ field so the user can upload a different file.
The Start Date field allows users to select the current date or a future date on which the Price Import will take effect.
The Client & Supplier multiselects will list all available Clients & Suppliers in the system. Those that are selected in these fields will be the ones that the Materials are imported for.
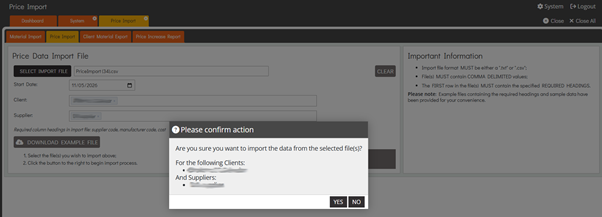
When the selected import file does not contain any rows with a Supplier Code, the user can select multiple Clients and Suppliers using the multi-select fields.
If the selected import file contains a Supplier Code for a Material that has not previously been imported with a Supplier Code, the system will allow the user to select a single Supplier. When the import is performed, the Supplier Code in the import file will be assigned to the selected Supplier for that Material. Each Supplier Code for a Material must be unique.
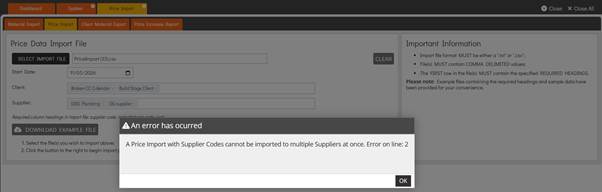
If the user selects multiple Suppliers for a Price Import containing Supplier Codes, the import will be prevented, and the system will display the following error message: “A Price Import with Supplier Codes cannot be imported to multiple Suppliers at once.”
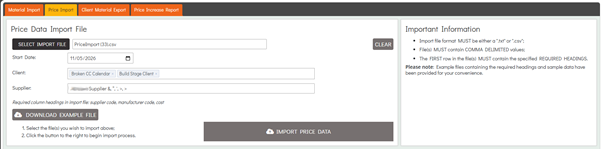
If the selected import file contains a Supplier Code for a Material that has previously been imported with the same Supplier Code, the system will automatically pre-populate the Supplier multi-select with the Supplier associated with that Supplier Code and the field becomes locked.
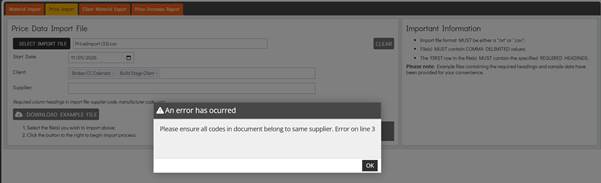
If the import file contains the same Material more than once with different Supplier Codes assigned to different Suppliers, the import will not be allowed. The system will display the following error message: “Please ensure all codes in document belong to same supplier.”
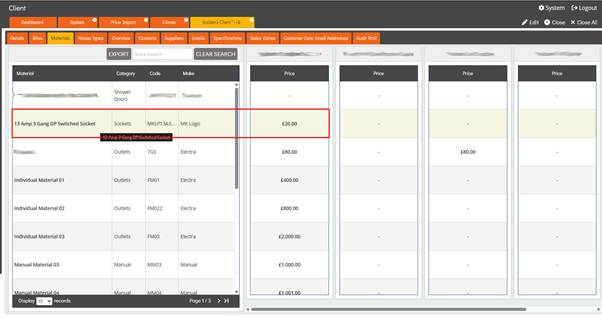
Once everything is finalised, the user must select the Import Price Data button to conclude the import. Once the file has been imported the system will instantly reflect this in Clients Materials for the Client(s) & Supplier(s) that were selected.
If a user attempts to perform a Price Import and the CSV file contains invalid rows or missing headers, the system will display an error message explaining the reason for the import failure.
Users can update Material Prices at any time by importing a file that meets the required criteria and adjusting the cost values. The updated costs will apply only to Materials that have not yet been ordered, while previously ordered Materials will retain the cost that was in effect at the time of purchase.
Client Material Export
The Client Material Export functionality allows users to export a CSV file containing all Materials associated with the selected Client and Supplier. The exported file can be viewed and edited if required before being re-imported into the system through the Price Import section.

To export the list of Materials for a Client’s Supplier, the user must first select a Client from the Client dropdown, which displays all non-deleted Clients in the system. Once a Client has been selected, the Supplier dropdown will be populated with the available Suppliers for that Client.
The Suppliers displayed in the dropdown are those assigned to the selected Client in the Client Suppliers area and that have a Cost associated with at least one Material for that Client. If a Supplier does not have a Cost for any Materials in relation to the selected Client, they will not be available for selection in the dropdown.
Once both selections have been made, the user can select the Export Materials button, which will download a CSV file containing the list of Materials and their associated Costs.
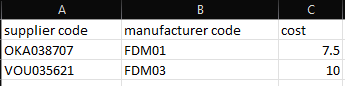
The Export includes three columns: Supplier Code, Manufacturer Code, and Cost, all of which are populated for each Material through the Price Import process.
Otherwise, the Supplier Code and Cost for a Material can be altered in the Materials Availability section.
Price Increase Report
The Price Increase Report provides a comparison of Material prices between two dates selected by the user. The report includes separate tabs for the Summary view, each House Type, and each Category associated with the Materials included in the report.
The Summary tab provides an overview of the price differences at Plot level.
Each Category tab displays the Materials associated with that Category and their price differences between the selected dates.
Each House Type tab provides a detailed view showing the previous and updated prices for the Materials associated with that House Type.
To download the Price Increase Report, the user must first select a Site from the Site dropdown, which displays all non-deleted Sites in the system. The selected Site determines the data used within the Price Increase Report.
The report also requires the user to select a Start Date and an End Date. The Start Date is used as the reference point for the Previous Prices, while the End Date is used for the Current Prices. The report will display the prices that were active on the selected dates.
Once all required fields have been populated, the user can select the Download Price Increase Report button. The system will then begin downloading the Excel spreadsheet containing the report data.

Categories Section:
The Price Increase Report contains a separate tab for each Category associated with the Materials included in the report. Categories are assigned to Materials either during the Material Import process or when a user manually creates a Material through the Materials area.
Each section of information displayed within the Category tabs is described below.
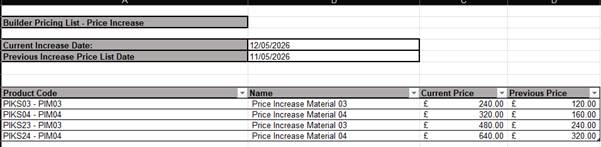
- Current Increase Date – Displays the End Date selected for the Price Increase Report.
- Previous Increase Price List Date – Displays the Start Date selected for the Price Increase Report.
- Product Code – Displays the Product Code for each Material associated with the selected Category. The Product Code is made up of the Supplier Code followed by a hyphen and the Material’s Manufacturer Code. The same Manufacturer Code may appear multiple times if the Material has prices assigned against multiple Suppliers; however, the Supplier Code portion of the Product Code will differ for each Supplier.
- Name – Displays the Name for each Material associated with the selected Category. The same Material Name may appear multiple times if the Material has prices assigned against multiple different Suppliers.
- Current Price – Displays the Current Price for each Material associated with the selected Category. The Current Price represents the price set for each Material on the selected End Date for the report.
- Previous Price – Displays the Previous Price for each Material associated with the selected Category. The Previous Price represents the price set for each Material on the selected Start Date for the report.
Summary Section:
The Summary section provides a Plot-level view of the price differences that have occurred between the selected dates for the Price Increase Report. Each section of the Summary is described below.
- Site Name – Displays the Site Name that the report relates to, as selected in the Site dropdown prior to downloading the report.
- Start Date – Displays the Start Date for the report, as selected from the Start Date selector prior to downloading the report.
- End Date – Displays the End Date for the report, as selected from the End Date selector prior to downloading the report.
- Housetype – Displays each Site House Type that has been added to the selected Site.
- Old Housetype Price – Displays the overall Material Price of the Site House Type on the selected Start Date for the report.
- Group Specified Items Uplift Cost – Displays the difference between the Old Housetype Price and the New Housetype Price.
- New Housetype Price – Displays the overall Material Price of the Site House Type on the selected End Date for the report.
- Qty Remaining – Displays the number of Plots that exist on the Site for the associated House Type. This value is used to calculate the Uplift amounts for the House Type.
- Total Uplift – Displays the Total Uplift that has occurred for the House Type. This is calculated by multiplying the Qty Remaining by the Group Specified Items Uplift Cost figure.
- Category Columns (Plot Breakdown) – The Plot Breakdown section of the table includes a column for each Category present in the report, with each column named after its corresponding Category. The value shown in each column represents the Uplift amount for that Category, calculated by taking the House Type Uplift for that Category and multiplying it by the Qty Remaining.
- Percentage of Total Uplift (Plot Breakdown) – The Plot Breakdown section of the table includes a Percentage of Total Uplift column for each Category present in the report. Each column displays a percentage representing the proportion of the Total Uplift. This is calculated by dividing the Uplift figure for the Category by the Total Uplift for the House Type.

House Type Section:
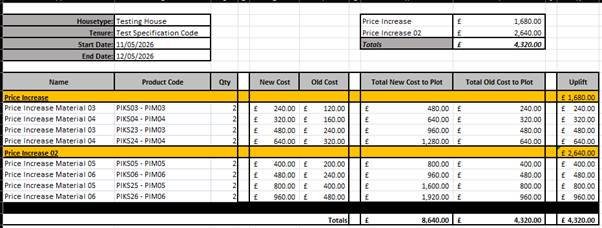
The Price Increase Report contains a tab for each Site House Type that has been added to the Site and included in the report. Each tab displays the differences between the Old and New Costs for the associated Site House Type. Each section within these tabs is described below.
Price Increase Report Information:
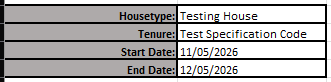
- Housetype – Displays the Name for the selected House Type.
- Tenure – Displays the Specification assigned to the selected House Type, as set within the House Type Details page.
- Start Date – Displays the Start Date for the report, as selected from the Start Date selector prior to downloading the report.
- End Date – Displays the End Date for the report, as selected from the End Date selector prior to downloading the report.
Uplift:
- Categories Column – Displays a row for each Category, showing the corresponding Category names.
- Uplift – Displays the Uplift for each Category, calculated based on the overall difference between the Old Costs and New Costs.
Cost Comparison:
- Name – Displays the Name of each Material included in the House Type, grouped by their associated Categories. Materials are listed under the relevant Category to show their classification within the House Type.
- Product Code – Displays the Product Code for each Material associated with the selected House Type. The Product Code is made up of the Supplier Code followed by a hyphen and the Material’s Manufacturer Code. The same Manufacturer Code may appear multiple times if the Material has prices assigned against multiple Suppliers; however, the Supplier Code portion of the Product Code will differ for each Supplier.
- Qty – Displays the Quantity of each Material present on the House Type.
- New Cost – Displays the New Cost for each Material per unit, which represents the Cost recorded on the End Date of the Price Increase Report.
- Old Cost – Displays the Old Cost for each Material per unit, which represents the Cost recorded on the Start Date of the Price Increase Report.
- Total New Cost to Plot – Displays the New Cost for the Plot for each Material, which represents the Cost recorded on the End Date of the Price Increase Report multiplied by the Material Qty.
- Total Old Cost to Plot – Displays the Old Cost for the Plot for each Material, which represents the Cost recorded on the Start Date of the Price Increase Report multiplied by the Material Qty.
- Uplift – Displays the Uplift for each Material on the House Type, which is calculated as the difference between the Total New Cost to Plot and the Total Old Cost to Plot.