Customer Care
The Customer Care area allows users to create, edit, manage, and delete Customer Care jobs within the system.
It consists of two main sections: the Customer Care Calendar and the Customer Care List, each providing a different view of Customer Care jobs. When the user first enters the Customer Care area, they are presented with the Customer Care Calendar by default. They can switch to the Customer Care List by selecting the List sub-tab.

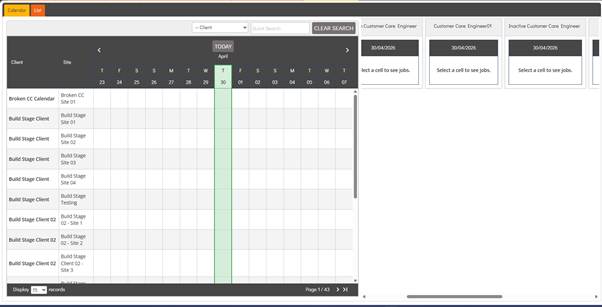
Customer Care Calendar
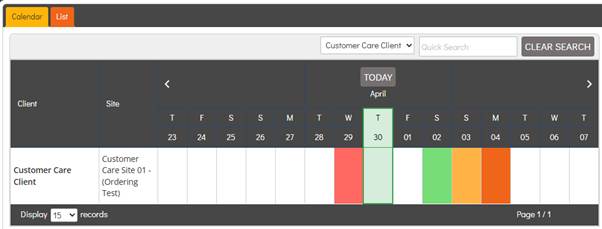
The Customer Care Calendar provides a calendar view of Customer Care jobs for each Site, relating to Active Clients in the system. It displays the current date, along with a week prior and a week ahead, allowing users to view both previous and scheduled Customer Care jobs.
The Calendar displays a row for each Site, with columns for Client, Site, and each date. The date columns also show the first initial of the day, and the current date column is highlighted in green to easily indicate the current date.
Users can navigate through the Customer Care Calendar by selecting the left arrow to move back two weeks or the right arrow to move forward two weeks. To quickly return to the current date, users can select the Today button, which will take them back to the default view.
The Customer Care Calendar displays Customer Care jobs based on their Booked Date, which is set on the Customer Care Details page.
Jobs are initially shown using the same colour as the Tab Colour defined on the Settings Details page. However, these colours may change depending on specific conditions, as outlined in the Customer Care Calendar Colours section.
To the right of the Calendar, the system displays Customer Care Calendar Tiles, which provide more detailed information about Customer Care jobs for each Customer Care Engineer.
Customer Care Calendar Filters
The Customer Care Calendar section includes a Quick Search feature that filters results based on the Site column.
It also includes a Client dropdown filter, which lists all non-deleted Clients in the system. When a client is selected, the calendar is filtered to display only the Sites associated with that Client.

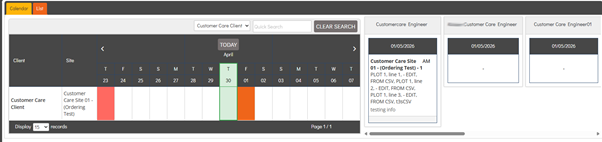
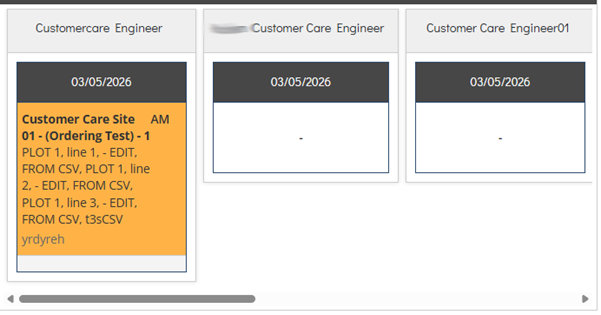
Customer Care Calendar Tiles
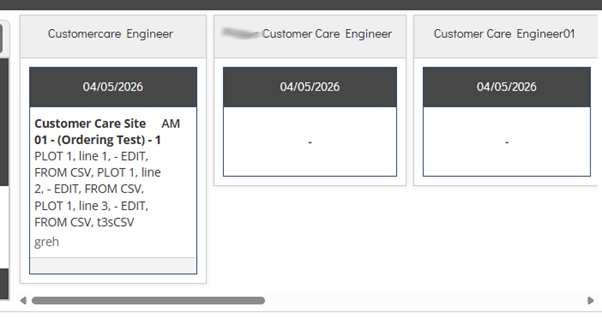
The Customer Care Calendar Tiles provide a detailed view of Customer Care jobs booked for a selected date. When a date is selected from the Calendar, the tiles display each Customer Care Engineer in the system along with the jobs assigned to them for the selected date.
Each job is presented as a tile containing key information such as the assigned Site, AM or PM designation, Plot, Plot Address, and additional job information.
The Site, AM/PM, Plot, and job Information are all entered and maintained on the Customer Care Details page.
Users can select a specific job tile, which will navigate directly to that job and automatically open it on the Customer Care Details page.
If a Customer Care Engineer has no jobs booked for the selected date, the system displays a blank cell containing a “–” to indicate that no work is scheduled for that engineer.
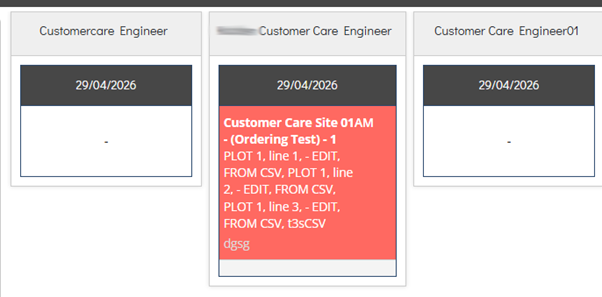
Tiles may appear in a highlighted colour when they meet specific criteria, as described in the Customer Care Calendar Colours section.
The Customer Care Calendar Tiles area allows users to manage and reschedule jobs using drag-and-drop functionality. Tiles can be moved between different Customer Care Engineers by clicking and holding a tile, then dragging it to another engineer. When a tile is reassigned in this way, the assigned engineer is updated automatically, and the change is reflected in the Operative multi-select field on the Customer Care Details page.
Users can also change a job’s scheduled time between AM and PM directly from the calendar. This is done by dragging the tile within the same engineer’s column and dropping it above or below the separator line to switch between AM and PM. Any change made to the time slot in the calendar is automatically updated in the AM/PM dropdown on the Customer Care Details page.
All changes made within the calendar view are synchronised with the corresponding fields in the detailed job record.
Customer Care Calendar Colours
The Customer Care Calendar Colours are used within both the Customer Care Calendar and the Customer Care Calendar Tiles to indicate the status of Customer Care jobs. These colours provide a visual indication of key stages, such as whether a job has had no activity, has been rearranged, or has been completed.
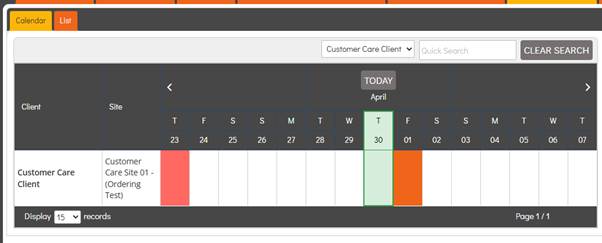
Customer Care Calendar:
Within the Customer Care Calendar, cells are highlighted using different colours to reflect the status of jobs on a given date.
Where multiple customer care jobs exist on the same date, colour precedence rules apply. If all jobs share the same status, the corresponding colour is displayed. If jobs have different statuses, the system defaults to displaying the standard Tab Colour from the Settings Details page.
The following rules define how Customer Care Calendar cells are coloured based on the status of each job:
- Shown in the Tab Colour defined on the Settings Details page when a job is scheduled for the current date or a future date and has not been rearranged or completed.
- Highlighted in red when a job is scheduled for a past date and has not been completed.
- Highlighted in amber when a job has been rearranged to the current date or a future date, which occurs when the Booked Date on the Customer Care Details page has been changed.
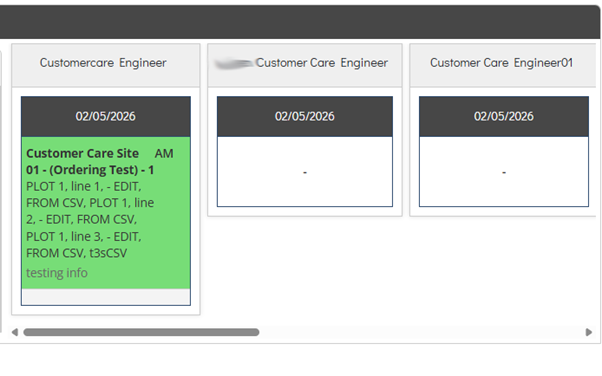
- Highlighted in green when a job has been marked as Completed, which is done by selecting the Completed checkbox within the Customer Care Details page.
Customer Care Calendar Tiles:
The Customer Care Calendar Tiles displays the colour codes for each individual job, as each job is displayed under the relevant Customer Care Engineer, the entire tile will be highlighted in the relevant colour.
The following rules define how Customer Care Calendar cells are coloured based on the status of each job:
- Shown in the default white/grey system colour when a job is scheduled for the current date or a future date and has not been rearranged or completed.
- Highlighted in red when a job is scheduled for a past date and has not been completed.
- Highlighted in amber when a job has been rearranged to the current date or a future date, which occurs when the Booked Date on the Customer Care Details page has been changed.
- Highlighted in green when a job has been marked as Completed, which is done by selecting the Completed checkbox within the Customer Care Details page.
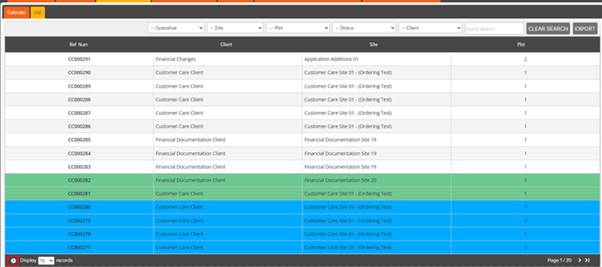
Customer Care List
The Customer Care List area provides a structured overview of all Customer Care jobs in the system, presenting them in a table format that highlights key information for each job. Each column displays specific details, as outlined in the Customer Care List Columns section.

The Customer Care List can display rows in defined highlight colours, which are configured within the Customer Care Colours area. The colour applied is determined by the number of Days Open for the Customer Care job, with the corresponding colour rule being used from the Customer Care Colours setup. Once a Customer Care job is marked as Completed, the row reverts to the default grey/white colour.
Customer Care List Filters
The Customer Care List includes a range of filters that enable users to refine the table based on specific criteria, making it easier to locate relevant jobs. These filters can be used together to further narrow results, and each is described in detail below.

- Operative – The Operative dropdown filter displays all Customer Care Engineers in the system. When a selection is made, the table is filtered to show only the Customer Care jobs currently assigned to the chosen engineer.
- Site – The Site dropdown displays all non-deleted Sites in the system. When a Site is selected, the table is filtered to show only Customer Care jobs associated with that Site. Selecting a Site also updates the Plot dropdown to display only the Plots linked to the chosen Site.
- Plot – The Plot dropdown filter is dependent on the selected Site and is initially blank until a Site is chosen. Once a Site is selected, the dropdown is populated with all Plots associated with that Site. When a Plot is selected, the table is filtered to display only Customer Care jobs currently assigned to that Plot.
- Status – The Status dropdown filter contains three fixed options: Needs Booking, Booked, and Completed. Selecting Needs Booking filters the table to show only Customer Care jobs that do not have a Booked Date assigned in the Customer Care Details page. Choosing Booked displays jobs that have a Booked Date but have not yet been marked as Completed. Selecting Completed filters the table to show only jobs that have been marked as complete, as determined by the Completed checkbox in the Customer Care Details page.
- Client – The Client dropdown filter displays all non-deleted Clients in the system. When a Client is selected, the table is filtered to show only Customer Care jobs currently assigned to the chosen Client.
The Customer Care List also contains a Quick Search feature which targets the Ref Num column.
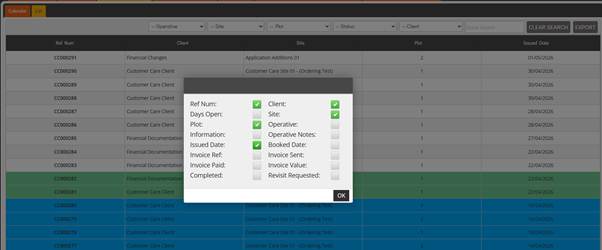
In the footer of the Customer Care List table, a cog icon is available to configure the visible columns.
Selecting this icon opens the column configuration modal, which contains a checkbox for each column. Deselecting a checkbox hides the corresponding column from the table, allowing users to tailor the view to display only the information they need. The Ref Num, Plot, Client, and Operative columns are mandatory and cannot be deselected.
Customer Care Export
The Customer Care Export enables users to generate tailored exports based on specific criteria. Users can define a date range using a selected date type, filter results by Client, and choose whether to include Invoice Values. The export can also be configured to include only Chargeable items if required.
When the Export button is selected, located in the top right corner above the table, the system displays the Export popup. This modal contains multiple date selectors, input fields, and checkboxes that allow users to define the export criteria, as described below.
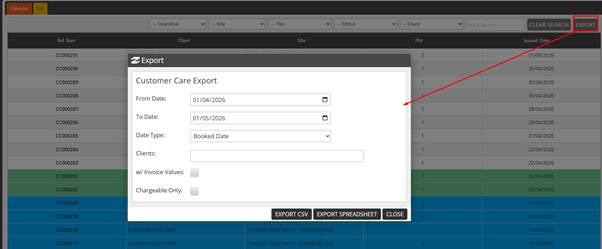
- From Date – The From Date defines the start of the Export period. It determines which Customer Care jobs are included in the Export based on the selected Date Type.
- To Date – The To Date defines the end of the Export period. It determines the latest date up to which Customer Care jobs are included in the Export, based on the selected Date Type.
- Date Type – The Date Type dropdown contains two fixed options: Booked Date and Issue Date. When Booked Date is selected, the From Date and To Date are applied to the Customer Care jobs’ Booked Date, and only jobs within that date range are included in the Export. When Issue Date is selected, the From Date and To Date are applied to the Customer Care jobs’ Issue Date instead, and the Export will include only jobs whose Issue Date falls within the specified range.
- Clients – The Clients multiselect displays all non-deleted Clients in the system. Any Clients selected in this field will be included in the Export results. If the field is left blank, the system will include Customer Care jobs for all Clients that meet the other defined Export criteria.
- w/ Invoice Values – The w/ Invoice Values checkbox controls whether the Invoice Values column is included in the CSV Export output. When selected, the Invoice Values column will be included in the exported CSV file. This option does not affect the Export Spreadsheet, as it does not contain an Invoice Value column; therefore, the setting only applies to the CSV format.
- Chargeable Only – When selected, this option excludes any rows where the Invoice Value is £0.00 from the Export. Only Customer Care jobs with an Invoice Value greater than £0.00 will be included in the exported results.
The Export feature provides two output options: Export CSV and Export Spreadsheet, each producing a different format and level of detail as described below.
EXPORT CSV:
All filters within the Export popup apply to the Export CSV option. The CSV output includes multiple columns that provide key information for each Customer Care job included in the export. Each column is described below.
- Ref Num – Displays the Reference Number for each Customer Care job, which is automatically generated by the system when the job is initially created.
- Client – Displays the Client associated with the Site that is assigned for the Customer Care job.
- Site – Displays the Site associated with each Customer Care job, as derived from the Site selected in the Customer Care Detailspage.
- Plot – Displays the Plot associated with each Customer Care job, as derived from the Plot selected in the Customer Care Details page.
- Operative – Displays the Operative associated with each Customer Care job, as derived from the Operative multiselect in the Customer Care Details page.
- Information – Displays any additional information recorded against the Customer Care job, as entered in the Information field within the Customer Care Details page.
- Operative Notes – Displays the Operative Notes recorded against each Customer Care job, as entered by the assigned Customer Care Engineer within the Customer Care Details page.
- Invoice Value – Displays the Invoice Value for each Customer Care job, which is calculated based on the recorded hours on the associated visit(s).
- Completed – Displays whether the Customer Care job is Completed, showing True or False based on the status of the Completed checkbox in the Customer Care Details page.
- Completed Date – Displays the Completed Date for each Customer Care job, showing the date on which the job was marked as completed.

EXPORT SPREADSHEET:
All filters from the Export popup apply to the Export Spreadsheet, with the exception of the w/ Invoice Values checkbox, as the Spreadsheet does not include an Invoice Values column. The Spreadsheet contains multiple columns that display key information for each Customer Care job included in the Export. In addition, rows may be highlighted in specific colours when certain criteria are met. Full details of the columns and conditional formatting are described below.
- Builder – Displays the Client associated with the Site that is assigned for the Customer Care job.
- Development Site – Displays the Site associated with each Customer Care job included in the Spreadsheet, as derived from the Site dropdown in the Customer Care Details page.
- Plot – Displays the Plot associated with each Customer Care job included in the Spreadsheet, as derived from the Plot dropdown in the Customer Care Details page.
- Address – Displays the Plot Address for the associated Plot of each Customer Care job included in the Spreadsheet, as derived from the address fields in the Plot Details page.
- Visit Date – Displays the Issued Date for each Customer Care job included in the Spreadsheet, which is the date the Customer Care job was created.
- Details of Work – Displays the Information for each Customer Care job included in the Spreadsheet, as derived from the Information field in the Customer Care Details page.
- Company Update Comments – The name of this column is dependent on the Short Name field in the Settings Details page, which is typically set to the company name using the system. The “Update Comments” portion of the column header is fixed, while the preceding text is configurable. The Company Update Comments column displays the update comments for each Customer Care job included in the Spreadsheet, as derived from the Latest Update field in the Customer Care Details page.
- Job Complete – Displays YES or NO for each Customer Care job included in the Spreadsheet, based on the status of the Completed checkbox in the Customer Care Details page.
- Job Chargeable – Displays YES or NO for each Customer Care job included in the Spreadsheet, based on the status of the Chargeable checkbox in the Customer Care Details page.

The Customer Care Export Spreadsheet can apply colour coding to rows when specific circumstances are met, providing a visual indication of the current stage of each Customer Care job and making the status of jobs easier to identify immediately. Each colour and the conditions under which it is applied are described below.
The Customer Care job is displayed in red if it has not been assigned a Booked Date within the Customer Care Details page.

The Customer Care job is displayed in amber if it has been marked as a Revisit by a Customer Care Engineer or Contract Manager on the Operative Portal. When a job is marked as a Revisit, the Revisit Required checkbox in the Customer Care Details page is selected. If a job has been marked as a Revisit but has also been marked as Completed, the Completed colour coding takes priority and overrides the Revisit colour.

The Customer Care job is displayed in green when it has been marked as complete. The completion status is determined by the Completed checkbox in the Customer Care Details page.

Customer Care List Columns
The Customer Care List table contains multiple columns that display key information for each Customer Care job in the system. Each column and the source of its values are explained below.
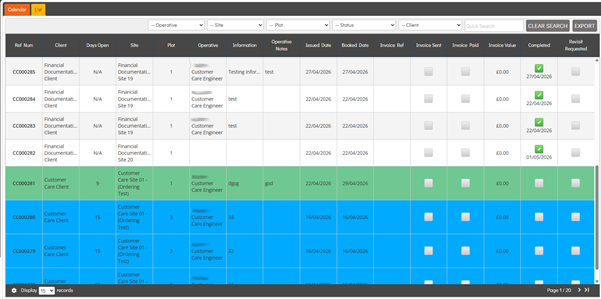
- Ref Num – Displays the Reference Number for each Customer Care job, which is automatically generated by the system when the job is created.
- Client – Displays the Client associated with the Site that is assigned for the Customer Care job.
- Days Open – Displays the number of days difference between the Issued Date and the Current Date. This value is shown as N/A once the Customer Care job has been marked as complete, which is determined by the Completed checkbox in the Customer Care Details page.
- Site – Displays the Site associated with each Customer Care job, as derived from the Site dropdown in the Customer Care Details page.
- Plot – Displays the Plot associated with each Customer Care job, as derived from the Plot dropdown in the Customer Care Details page.
- Operative – Displays the Operative associated with each Customer Care job, as derived from the Operative multiselect within the Customer Care Details page.
- Information – Displays the Information associated with each Customer Care job, as derived from the Information field within the Customer Care Details page.
- Operative Notes – Displays the Operative Notes associated with each Customer Care job, as derived from the Operative Notes field in the Customer Care Details page.
- Issued Date – Displays the Issued Date for each Customer Care job, as derived from the Issue Date field in the Customer Care Details page.
- Booked Date – Displays the Booked Date for each Customer Care job, as derived from the Booked Date field in the Customer Care Details page.
- Invoice Ref – Displays the Invoice Reference associated with each Customer Care job, as derived from the Reference field in the Customer Care Details page.
- Invoice Sent – Displays a checkbox for each Customer Care job, the status of this checkbox is determined by the status of the Invoice Sent checkbox in the Customer Care Details page. The system also displays the Invoice Sent Date beneath the checkbox, which is derived from the Invoice Sent Date field in the Customer Care Details page.
- Invoice Paid – Displays a checkbox for each Customer Care job, the status of this checkbox is determined by the status of the Invoice Paid checkbox in the Customer Care Details page. The system also displays the Invoice Paid Date beneath the checkbox, which is derived from the Invoice Paid Date field in the Customer Care Details page.
- Invoice Value – Displays the Invoice Value for each Customer Care job. This is calculated using the Customer Care Callout Fee, Hourly Rate, Out of Hours Rate, and Materials Uplift defined in the Settings Details page. These rates and fees are then applied to the Additional Visits, Additional Hours, Out of Hours Time, and Materials Cost values recorded in the Customer Care Details page. Each Additional Visit entered in the Customer Care Details page applies the Callout Fee. Each instance of Additional Hours added applies the Hourly Rate. Each instance of Out of Hours Time applies the Out of Hours Rate. Each time Materials are added in the Customer Care Materials page, the Materials Uplift percentage is applied to the Total Material Cost.
- Completed – Displays a checkbox for each Customer Care job, with the status determined by the Completed checkbox in the Customer Care Details page. If a Customer Care job is marked as completed, the date it was completed is also displayed beneath the checkbox in the list page.
- Revisit Requested – Displays a checkbox for each Customer Care job, with the status determined by the Revisit Required checkbox in the Customer Care Details page. This checkbox cannot be selected within the admin system, as it is set by a Customer Care Details or Contract Manager via the Operative Portal.
Creating & Deleting Customer Care
To create a new Customer Care job, the user can select the + New button located in the top right corner. The + New button is available in both the Customer Care Calendar view and the Customer Care List view.

The system will then navigate the user to a new Customer Care record, automatically opening on the Customer Care Details page, where the relevant job details can be entered.
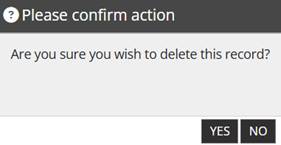
The user can delete a Customer Care job at any time by selecting the required record from the table, entering Edit mode, and then selecting the Delete button located in the top right corner.

The system will display a confirmation popup asking the user to confirm the deletion. If Yes is selected, the Customer Care job will be deleted.
Deleted Customer Care records are only visible to users who have the Super User switch enabled in their user record. In the Customer Care List, deleted records are highlighted in red to indicate their status.

Super Users can Restore deleted Customer Care records at any time by selecting the deleted record from the table and choosing the Restore button in the top right corner. Once restored, the record will return to its default colour and become active again.
Details
The Customer Care Details page is divided into three sections: Customer Care Details, Booking Details, and Invoicing. Each section is used to capture different aspects of the Customer Care job, and each is described below.
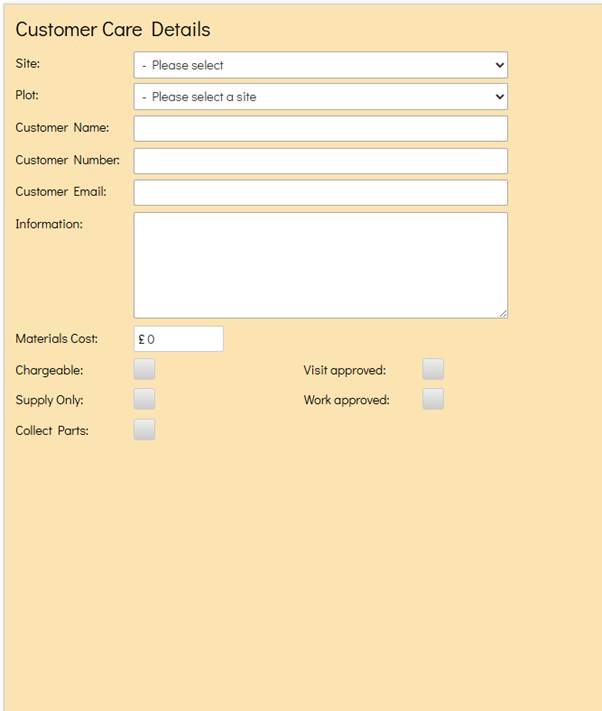
Customer Care Details:
- Site – The Site dropdown lists all non-deleted Sites in the system. When a Site is selected, the Plot dropdown is automatically populated with the Plots associated with the selected Site.
- Plot – The Plot dropdown lists all non-deleted Plots associated with the selected Site. When a Plot is assigned and the record is saved, the page displays the Plot Address and Postcode fields, which are automatically populated using the address details from the Plot Details page.
- Plot Address – The Plot Address fields appear once a Plot has been selected and the record is saved. These fields are not editable within the Customer Care record, as they are pre-populated and derived from the Plot Details page.
- Postcode – The Postcode field appears once a Plot has been selected and the record is saved. This field is not editable within the Customer Care record, as it is pre-populated and derived from the Plot Details page.
- Customer Name – Customer Name is a free-text field, allowing the user to manually enter the Customer’s Name.
- Customer Number – Customer Number is a free-text field, allowing the user to manually enter the Customer’s Contact Number.
- Customer Email – Customer Email is a free-text field, allowing the user to manually enter the Customer’s Email Address.
- Information – Information is a free-text field, allowing the user to enter any additional relevant details relating to the Customer Care job.
- Materials Cost – Material Cost is a read-only field that is automatically calculated by the system based on the Materials added within the Customer Care Materials section. Materials are assigned to individual Suppliers, and multiple Suppliers can have Materials recorded against them, including different Materials across different Suppliers. The Total Material Cost is derived from all entered Materials and is based on the Supplier Costs associated with those Materials.
- Chargeable – The Chargeable checkbox determines whether the Customer Care job is treated as Chargeable. When selected, the Invoice Value for the job is calculated accordingly. When deselected, the Invoice Value is set to £0.00. If the Customer Care Export is run with the Chargeable Only option selected, any Customer Care jobs where the Chargeable checkbox is deselected will be excluded from the Export.
- Supply Only – When the Supply Only checkbox is selected, the Invoice Value for the Customer Care job is calculated using only the Material Cost, with the Material Uplift from the Settings Details page applied.
- Collect Parts – The Collect Parts checkbox indicates whether the parts for the job need collecting, if selected then this means the parts need to be collected.
- Visit Approved – The Visit Approved checkbox indicates whether the visit associated with the Customer Care job has been approved.
- Work Approved – The Work Approved checkbox indicates whether the work associated with the Customer Care job has been approved.
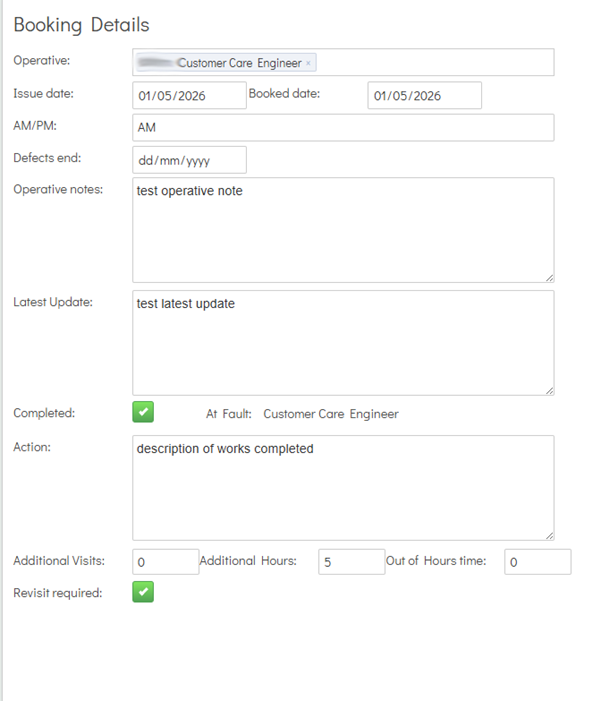
Booking Details:
- Operative – The Operative multiselect lists all non-deleted Customer Care Engineers who are assigned to the selected Site for the Customer Care job. The system allows one or more engineers to be assigned to a job, and these are the engineers for whom the job will appear in the Operative Portal.
- Issue Date – The Issue Date selector allows the user to select any date. This date is used to calculate how many Days Open the Customer Care job is, based on the difference between the Issue Date and the current date.
- Booked Date – The Booked Date selector allows the user to select any date. This is the date on which the job will appear in the Customer Care Calendar for the selected Operative(s), as well as the date it will be visible to the Customer Care Engineer or Contract Manager in the Operative Portal.
- AM/PM – This dropdown contains two options: AM and PM. The selected option determines whether the job appears in the AM or PM section within the Customer Care Calendar Tiles, as well as whether it appears in the AM or PM list for the Contract Manager or Customer Care Engineer in the Operative Portal.
- Defects End – The Defects End Date selector allows the user to specify the date on which the defects period ends for the Customer Care job.
- Operative Notes – Operative Notes is a free-text field that allows the user to enter notes intended for the assigned Customer Care Engineer(s). These notes will be visible to the Contract Manager or Customer Care Engineer when they select the job in the Operative Portal.
- Latest Update – Latest Update is a free-text field that allows the user to record the most recent update or progress relating to the Customer Care job. This update will also be visible to the Contract Manager or Customer Care Engineer when they view the job in the Operative Portal.
- Completed – The Completed checkbox determines whether the Customer Care job has been completed. This can be selected when entering Edit mode in the admin system, or it may already be selected if a Contract Manager or Customer Care Engineer has marked the job as complete via the Operative Portal.
- At Fault – This field is read-only within the admin system. It is populated once a Contract Manager or Customer Care Engineer has saved or marked the job as complete in the Operative Portal and selected who is at fault. The available options for who can be selected as at fault are derived from the Customer Care Faults area.
- Action – The Action field can be edited in the admin system when the user enters Edit mode. It may also be pre-populated, as it inherits the Description of Works Completed entered by the Contract Manager or Customer Care Engineer when completing the job in the Operative Portal.
- Additional Visits – The Additional Visits field accepts any numeric value. This represents the number of Additional Visits that have taken place for the Customer Care job. Each Additional Visit applies the Callout Fee from the Settings Details page towards the total Invoice Value.
- Additional Hours – The Additional Hours field accepts any numeric value. This represents the number of Additional Hours recorded for the Customer Care job. Each Additional Hour applies the Hourly Rate from the Settings Details page towards the total Invoice Value. This field may be pre-populated, as the Contract Manager or Customer Care Engineer can enter hours spent on the job through the Operative Portal.
- Out of Hours Time – The Out of Hours Time field accepts any numeric value. This represents the amount of Out of Hours Time recorded for the Customer Care job. Each instance of Out of Hours Time applies the Out of Hours Rate from the Settings Details page towards the total Invoice Value.
- Revisit Required – The Revisit Required checkbox is read-only in the admin system. Its status is determined by whether the Contract Manager or Customer Care Engineer has marked the Customer Care job as requiring a revisit via the Operative Portal. When the job requires a revisit, the checkbox is automatically updated and the revisit request is placed in the Customer Care Revisit Requests section.
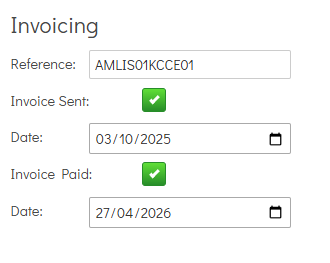
Invoicing:
- Reference – The Reference field is a free-text field that allows the user to enter the relevant Reference for the Customer Care job. This value is then displayed in the Invoice Ref column within the Customer Care List Columns.
- Invoice Sent – The Invoice Sent checkbox determines whether the invoice for the Customer Care job has been sent. When selected and the record is saved, the Invoice Date is automatically populated with the date the checkbox was selected. Once selected, this status is also reflected in the Invoice Sent column within the Customer Care List Columns, including the date the invoice was sent for the relevant job.
- Invoice Sent Date – The Invoice Sent Date is a date selector that allows the user to select any date, which will also be displayed in the Invoice Sent column in the Customer Care List Columns.
- Invoice Paid – The Invoice Paid checkbox determines whether the invoice for the Customer Care job has been Paid. When selected and the record is saved, the Invoice Paid Date is automatically populated with the date the checkbox was selected. Once selected, this status is also reflected in the Invoice Paid column within the Customer Care List Columns, including the date the invoice was Paid for the relevant job.
- Invoice Paid Date – The Invoice Paid Date is a date selector that allows the user to select any date, which will also be displayed in the Invoice Paid column in the Customer Care List Columns.
Send Builder Update
The Builder Update is an Email sent using the Customer Care Builder Update template from the Email Templates area.
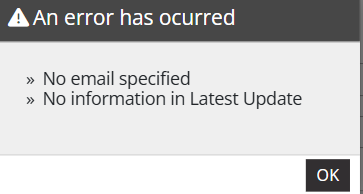
To send the Builder Update, the Customer Care job must have a populated Latest Update field in the Customer Care Details page. If this field is empty, the system will prevent the Email from being sent and display an error message informing the user that no information is available in the Latest Update field.

The Send Builder Update button is located in the bottom right-hand corner of the Customer Care Details page when the user is in Edit mode.
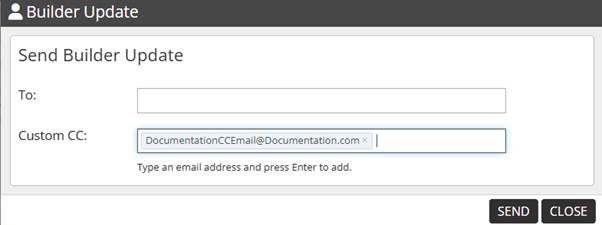
When the Send Builder Update button is selected, the system displays the Send Builder Update popup, which contains a To and Custom CC multiselect.
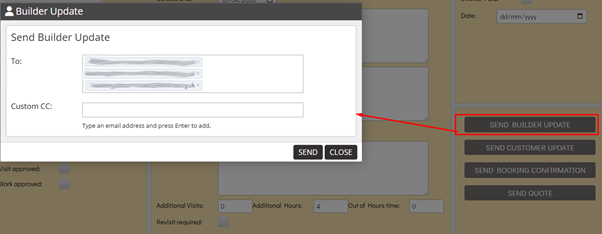
The To multiselect is pre-populated with the relevant Client’s Customer Care Email Addresses by default. The default To Emails can be removed by selecting the “x” on each Email. If removed, they can be added back by clicking inside the multiselect, where the system will display the previously removed Customer Care Email Addresses for selection again.
The user can also add additional recipients in the Custom CC field by entering the required Email Address and pressing Enter on the keyboard.
Send Customer Update
The Customer Update is an Email sent using the Customer Care Customer Update template from the Email Templates area.
To send the Customer Update, the Customer Care job must have a populated Latest Update & Customer Email field in the Customer Care Details page. If these fields are empty, the system will prevent the Email from being sent and display an error message informing the user that no information is available in the Latest Update & Customer Email fields.
The Send Customer Update button is located in the bottom right-hand corner of the Customer Care Details page when the user is in Edit mode.
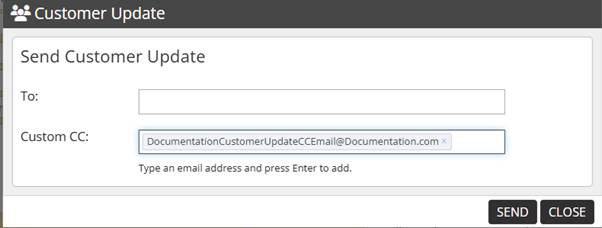
When the Send Customer Update button is selected, the system displays the Send Customer Update popup, which contains a To and Custom CC multiselect.
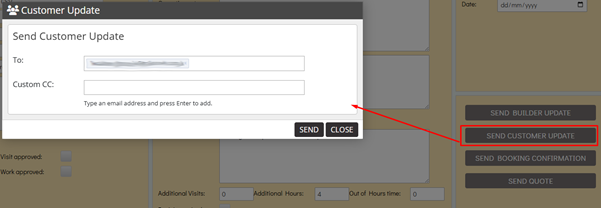
The To multiselect is pre-populated with the relevant Customer Email from the Customer Care Details page by default. The default To Email can be removed by selecting the “x” on the Email. If removed, it can be added back by clicking inside the multiselect, where the system will display the previously removed Customer Email for selection again.
The user can also add additional recipients in the Custom CC field by entering the required Email Address and pressing Enter on the keyboard.
Send Booking Confirmation
The Booking Confirmation is an Email sent using the Customer Care Booking Confirmation template from the Email Templates area.
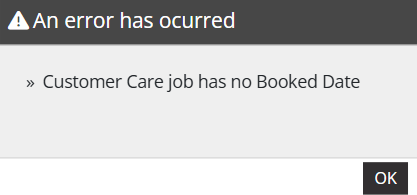
To send the Booking Confirmation, the Customer Care job must have a populated Customer Email & Booked Date field in the Customer Care Details page. If these fields are empty, the system will prevent the Email from being sent and display an error message informing the user that no information is available in the Customer Email & Booked Date fields.
The Send Booking Confirmation button is located in the bottom right-hand corner of the Customer Care Details page when the user is in Edit mode.
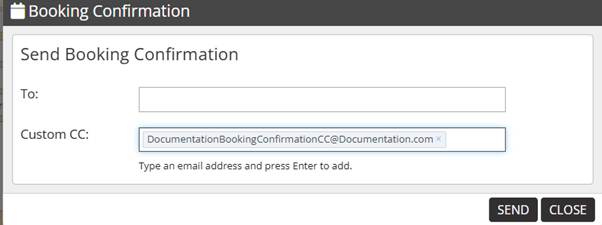
When the Send Booking Confirmation button is selected, the system displays the Send Booking Confirmation popup, which contains a To and Custom CC multiselect.
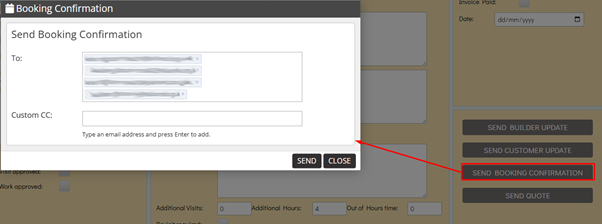
The To multiselect is pre-populated with the relevant Customer Email from the Customer Care Details page & the relevant Client’s Customer Care Email Addresses by default. The default To Emails can be removed by selecting the “x” on each Email. If removed, they can be added back by clicking inside the multiselect, where the system will display the previously removed Customer & Client Customer Care Emails for selection again.
The user can also add additional recipients in the Custom CC field by entering the required Email Address and pressing Enter on the keyboard.
Send Quote
The Quote is an Email sent using the Customer Care Quote template from the Email Templates area.
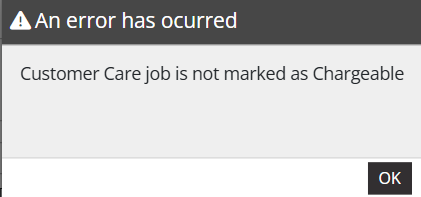
To send the Quote, the Customer Care job must have the Chargeable checkbox selected in the Customer Care Details page. If this checkbox is deselected, the system will prevent the Email from being sent and display an error message informing the user that the Customer Care job is not marked as Chargeable.
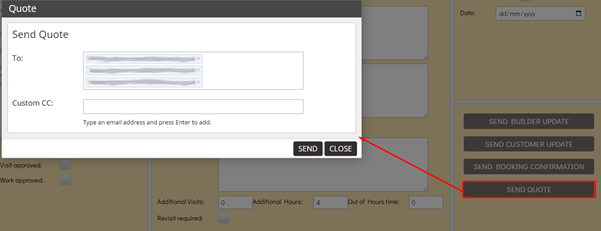
The Send Quote button is located in the bottom right-hand corner of the Customer Care Details page when the user is in Edit mode.
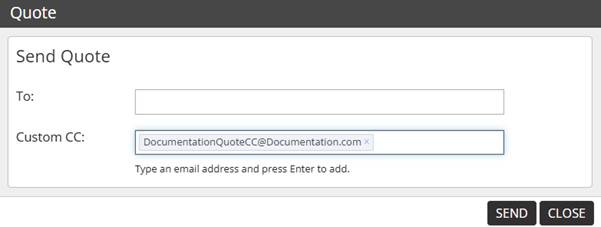
When the Send Quote button is selected, the system displays the Send Quote popup, which contains a To and Custom CC multiselect.
The To multiselect is pre-populated with the relevant Client’s Customer Care Email Addresses by default. The default To Emails can be removed by selecting the “x” on each Email. If removed, they can be added back by clicking inside the multiselect, where the system will display the previously removed Client Customer Care Email Addresses for selection again.
The user can also add additional recipients in the Custom CC field by entering the required Email Address and pressing Enter on the keyboard.
Documents
The Customer Care Documents section allows users to add, edit, and delete Documents for the Customer Care job, as well as view images uploaded by a Contract Manager or Customer Care Engineer when completing the job through the Operative Portal.
Images uploaded via the Operative Portal are displayed in the table with the Document Name shown as “Upload”.
The Type column indicates whether the image is “Prior to work” or “Completed work”, depending on whether it was uploaded in the Photos of area prior to work or Photos of Works Completed section in the Operative Portal.
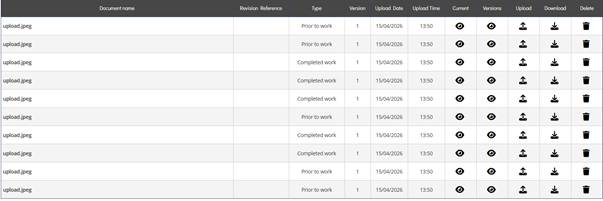
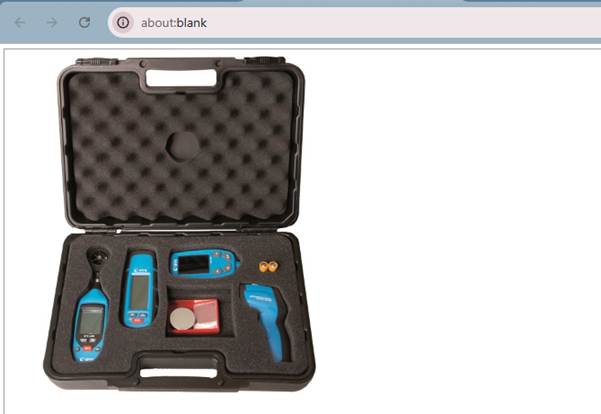
These images can be viewed by selecting the icon in the Current column, which opens the image in a new tab.
Alternatively, the user can select the icon in the Versions column to open the Versions popup and select the View button to display the image.

Functionality for these uploaded images is consistent with Documents added directly through the admin system, as described below.
The Documents section contains a Quick Search which targets the Document Name column.
To upload a Document to the Customer Care, the user can enter Edit mode and populate the Document Name and Revision Reference fields with the desired details. The user can then select the UPLOAD button, which will open the File Explorer to allow a file to be selected. Once a file is chosen, it will be uploaded to the Customer Care and displayed in the table.
To upload a new version of a Document, the user must enter Edit mode and select the icon in the Upload column. This opens the File Explorer, allowing the user to choose a file. Once uploaded, the file becomes the most recent version of the Document and will be listed in the Versions popup.
To View an existing Document, the user can select the icon in the View column for the desired Document, which will open a new browser tab displaying the most recent version.
Alternatively, the user can select the icon in the Versions column to view a table containing all Versions of the Document. From this table, the user can select the icon in the View column to open a new browser tab displaying the selected version of the file.
To Delete an existing Document, the user must enter Edit mode and select the icon in the Delete column. The system will display a confirmation dialog warning that deleting the document and all its versions is permanent. Once Yes is selected, the Document is deleted and cannot be recovered.
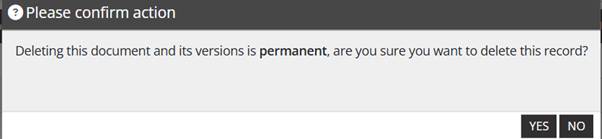
Deleted Documents are permanently removed from the Customer Care Documents list and cannot be viewed or accessed in any way.
Revisit Requests
The Revisit Requests section enables users to review and manage revisit requests associated with a selected Customer Care job.
In this section, users can view all submitted Revisit Requests and take action by approving those that meet the required criteria or rejecting those that are not valid or need further clarification. This ensures that all follow-up visits are carefully reviewed and authorized before any additional action is taken.
The Revisit Requests section contains a Quick Search feature which targets the Notes column.

Revisit Requests cannot be submitted through the admin system; they are created by a Contract Manager or Customer Care Engineer via the Operative Portal while completing the Customer Care job.
The table displays all submitted Revisit Requests, with each column providing key information about the request, as described below.
- Operative – Displays the name of the Operative who submitted the Revisit Request.
- Notes – Displays the Revisit Note associated with the Revisit Request, as entered in the Revisit Notes section on the Operative Portal.
- Status – The Status column displays one of three outcomes, as described below:
- Awaiting Approval – This status indicates that the Revisit Request has been submitted and is awaiting approval or rejection.
- Rejected – This status indicates that the Revisit Request has been rejected.
- Approval – This status indicates that the Revisit Request has been approved.
- Created Date – The Created Date column displays the date the Revisit Request was submitted.
- Created Time – The Created Time column displays the time the Revisit Request was submitted.
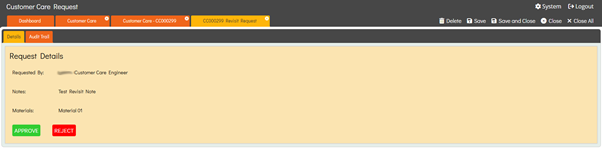
When a user selects a Revisit Request from the table, the system opens a new tab and directs them to the Request Details page.
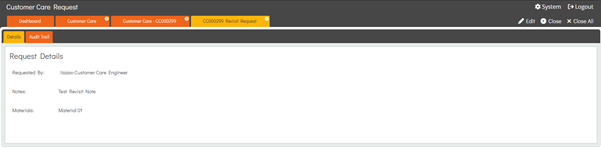
The Request Details page contains three lines of information, each described below.
- Requested By – Requested By identifies the Operative who submitted the Revisit Request.
- Notes – Notes displays the Revisit Notes entered by the Operative who submitted the Revisit Request.
- Materials – Materials lists the Revisit Materials required, as entered by the Operative who submitted the Revisit Request.
When the user enters Edit mode on the Request Details page, two additional buttons appear: Approve and Reject.
When Approve is selected, the Revisit Request is marked as approved, and the system automatically creates a new Customer Care record. The user is then directed to this new record, which is pre-populated with the same Customer Care Details as the original job.
The approved Revisit Request’s job will include the entered Revisit Note and Revisit Materials within the Latest Update field.
When Reject is selected, the Revisit Request is marked as rejected and no new Customer Care job is created for the submitted Revisit Request.
Materials
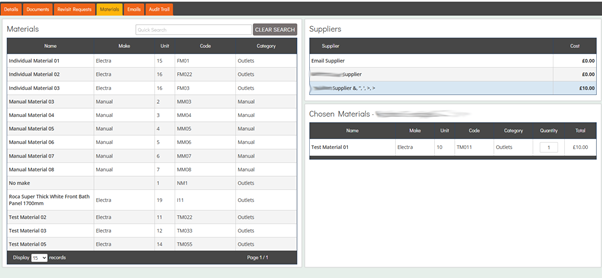
The Customer Care Materials section allows users to view, manage, and purchase Materials for the Customer Care job. It is divided into three tables, as described below.
The Materials table lists all Materials associated with the selected Client for the Customer Care job. It includes a Quick Search feature that filters results based on the Name column.
The Suppliers table lists all Suppliers associated with the selected Client for the Customer Care job.
To add Materials to a Supplier, the user must enter Edit mode, which makes Suppliers selectable. Once a Supplier is selected, an additional column appears in the Materials table containing a + icon, allowing the user to add desired Materials for purchasing against that Supplier.
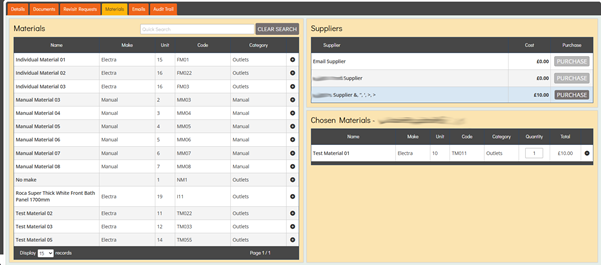
When Materials are added, the Cost column in the Suppliers table is updated to reflect the relevant Costs for those Materials from the selected Supplier.
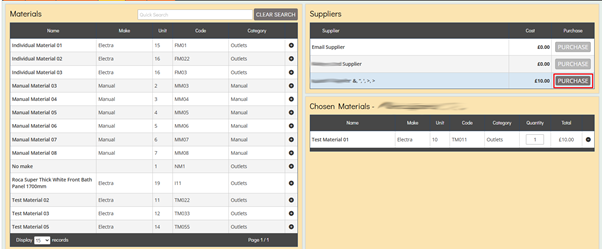
The Chosen Materials table displays all selected Materials. When in Edit mode, the Quantity field becomes editable, allowing users to adjust quantities as needed, with the Cost column updating accordingly.
Materials can also be removed using the – icon, which returns them to the Materials table for selection again.
When Materials have been added to a Supplier and the user enters Edit mode, the Purchase button becomes available in the Suppliers table.
Selecting this button automatically creates a new Purchase Order pre-populated with the Customer Care job details and includes the Materials added for the selected Supplier.
Once Materials are added in this section, the Materials Cost field on the Customer Care Details page is also updated.
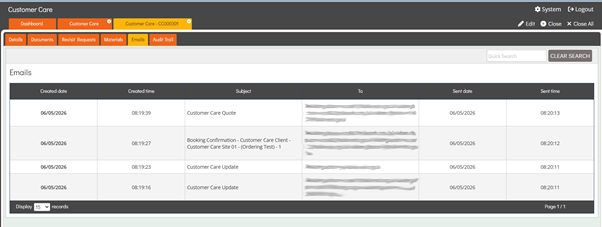
Emails
The Customer Care Emails section contains a table that lists all Emails sent in relation to the selected Customer Care job.
This section includes a Quick Search feature that filters results based on the Subject and To columns.
The Emails that can appear in this section are described below.
- Customer Care Builder Update
- Customer Care Customer Update
- Customer Care Booking Confirmation
- Customer Care Quote
The Emails table contains multiple columns which each display key information about the Emails that have been sent, as described below.
- Created Date – Displays the Created Date for each Email sent, which is the date the Email was created for sending.
- Created Time – Displays the Created Time for each Email sent, which is the time the Email was created for sending.
- Subject – Displays the Subject for each Email, which indicates the type of Email sent, such as Customer Care Update, Booking Confirmation, or Customer Care Quote.
- To – Displays the recipient(s) the Email was sent to. This can include a single Email Address or multiple Email Addresses.
- Sent Date – Displays the Sent Date for each Email sent, which is the date the Email was sent to the recipient(s).
- Sent Time – Displays the Sent Time for each Email sent, which is the time the Email was sent to the recipient(s).